In this article:
👇 Note that all screenshots below will be light mode for Azure Active Directory and dark mode for Foxo, to make it easier to distinguish the two while going through the setup steps.
Prerequisites
- Be an administrator of your Foxo organisation
- Be an administrator for your organisation’s Azure Active Directory
- Contact Foxo staff to enable the Active Directory feature for your organisation on Foxo
Getting started
- Head to Microsoft Entra ID in your Azure account.
.png?width=688&height=136&name=image%20(2).png)
- In your Microsoft Entra ID, go to Enterprise applications.
.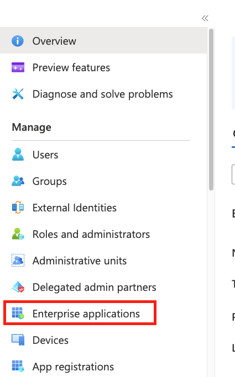
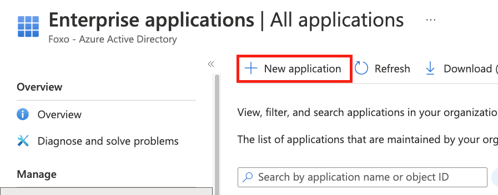
- Create a new application.
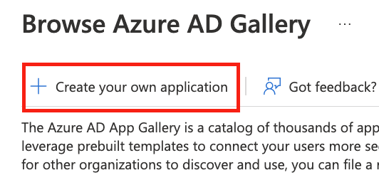
- Choose Create your own application. Do NOT search for an application in the Microsoft App Gallery.
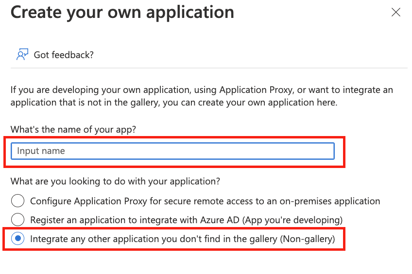
- Name the application to your liking (we suggest a name containing “Foxo”) and choose the non-gallery option.
- You are ready to setup SSO and Provisioning.
Single Sign-On
👉 Single Sign-On is a solution used to sign in your users with a third-party application such as Foxo without having to provide email and password. Additionally, it allows for a trust relationship with the user coming through the organisation's Active Directory.
In order to setup SSO with Foxo and your Azure Active Directory you will need to copy credentials between both applications. Your Active Directory is considered an Identity Provider (IdP) and Foxo is considered a Service Provider (SP) in the SSO context.
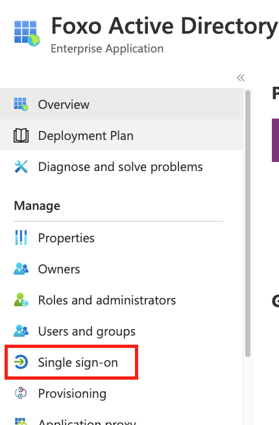
- Start the Single Sign-On configuration in your Active Directory choosing the Single Sign-On section when inside the Enterprise Application you created in the previous step.
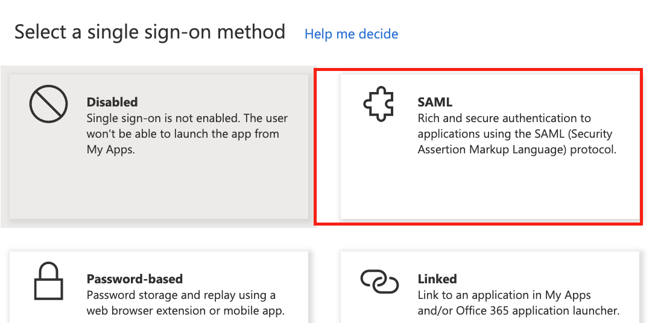
- On the right hand side, choose SAML
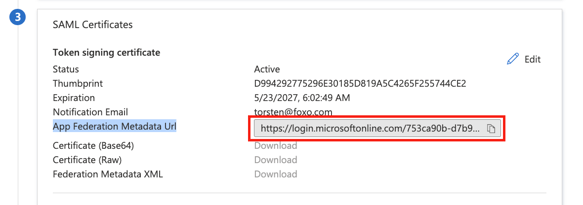
- Scroll down the page until you reach the SAML Certificates section. Copy the value for App Federation Metadata Url to you clipboard.
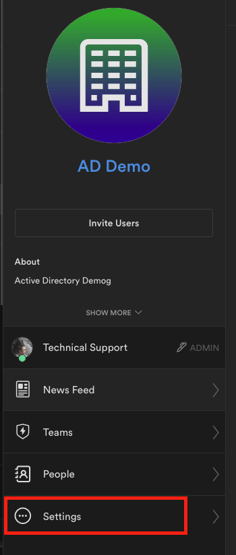
- Head to your Foxo application and go your Organisation’s settings.
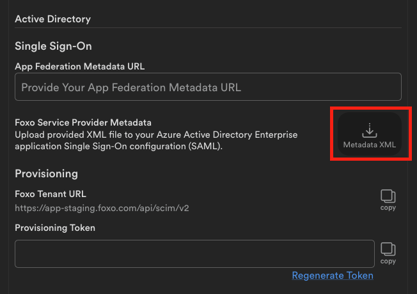
- Go to the Single Sign-On tab. Paste your App Federation Metadata URL in the relevant input field and save your changes.

- Download the Foxo Service Provider Metadata XML file and save it on your computer (we will use it in the next step).
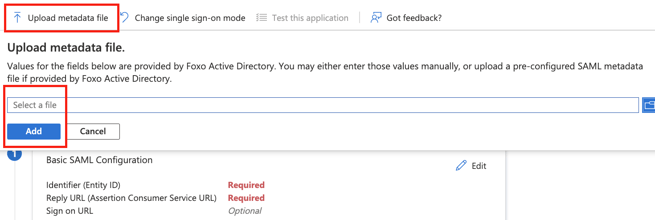
- Head back to your Active Enterprise organisation’s SAML configuration page and upload the XML file. Select a file and click “Add”. This will slide in another window. Simply press Save at the top of that window.
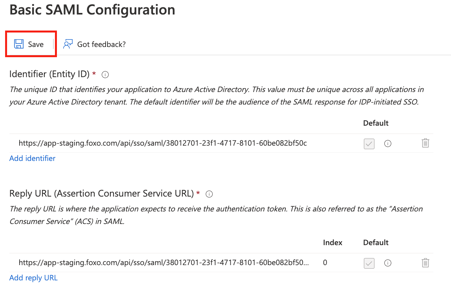
- Select and copy the Entity ID which was just created to your clipboard. This URL can later be used to sign-in your members with Foxo.

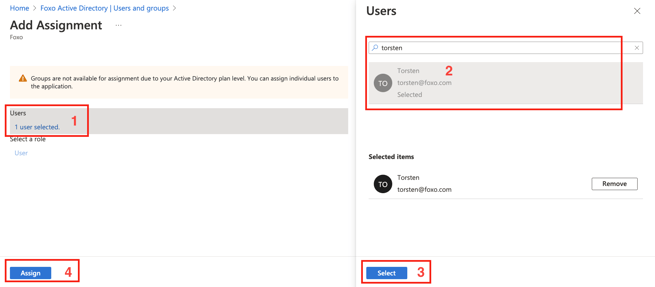
- Before you can test the setup, you will have to assign users to your enterprise application. Head to the Users and Groups section and Add user/groups.
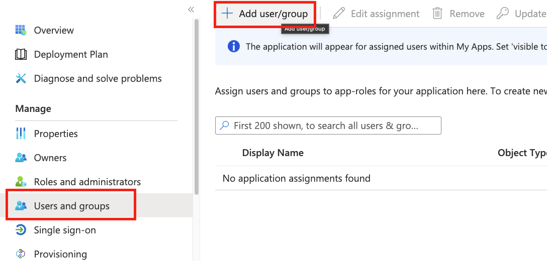
- Assign at least your own user in order to test the SSO process. You can assign more members of your organisation later.
- Open the URL you copied in step 8 in your browser. (Note: If you want to test it from scratch including the Active Directory sign-in, use the browser in incognito mode). This should direct you through the SSO sign-in process and either connect your SSO account automatically with an account you have already set up on Foxo OR ask you to create/connect a new account.
Provisioning
👉 While Single Sign-On is great to sign in users with another platform, the provisioning feature is used to onboard users into your organisation on Foxo before they have an account on Foxo. The provisioning creates accounts on the users' behalf and you can use it to invite members to Foxo Teams ahead of time (within Foxo).
❗Note that Provisioning will only work if you have set up Single Sign-On correctly in the previous main section.
❗Team provisioning (automatically assigning new members to teams in your organisation) is not yet supported.
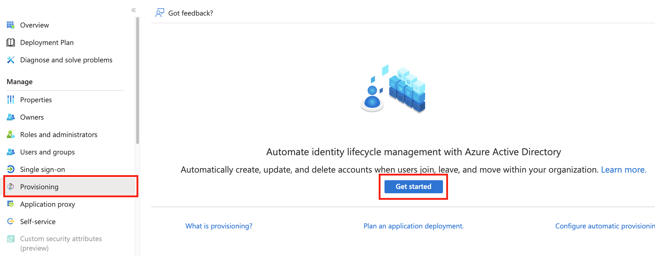
- In your Active Directory Enterprise application head to the Provisioning section and press Get started.
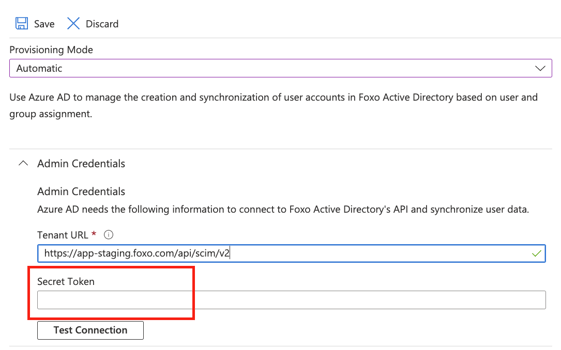
- Select Automatic as Provisioning Mode. Fill in the Tenant URL, which you will get in Foxo in the next step.
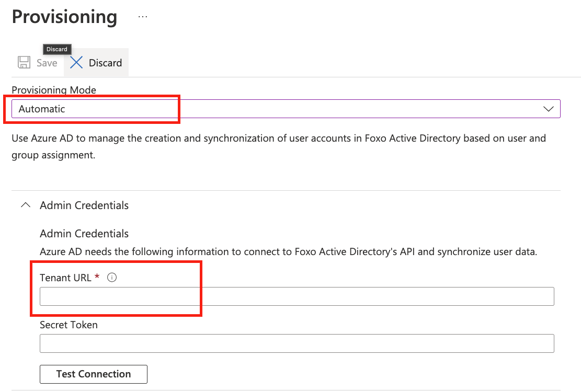
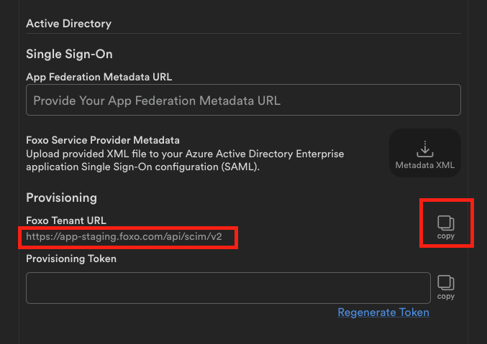
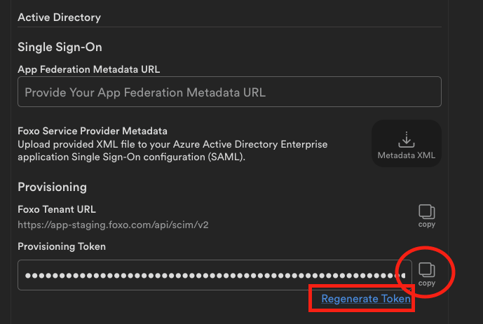
- Head to the Active Directory Provisioning section in your Foxo Organisation settings. Copy the value provided under Foxo Tenant URL to your clipboard and paste it to the highlighted field in your Active Directory Provisioning configuration from the previous step.
- Next we will provide the Secret Token for provisioning. This is provided by the Foxo application (next step).
- Head to the Active Directory Provisioning section in your Foxo organisation settings. Check the Provisioning Token input field. If empty press Regenerate Token below. Once done, copy the value provided to your clipboard and paste it to the highlighted field in your Active Directory Provisioning configuration from the previous step.
- After all values are in place, press Test Connection in your Active Directory Enterprise application Provisioning configuration. If successful, a green tick will appear shortly after. Then, Save the configuration.

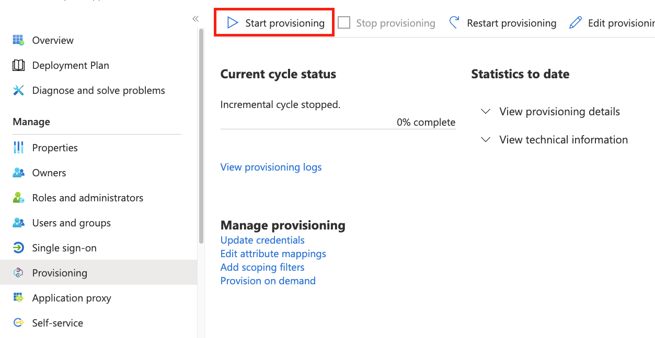
- Head back to the main Provisioning section in your Active Directory Enterprise application and Start Provisioning. The original provisioning will be run very soon afterwards. Note that Azure Active Directory does not run Provisioning right away after you made any changes (e.g. adding new users) and it can take up to 15-30 minutes until the changes appear in Foxo.
- You are all set! You can now head to Users and Groups to assign new users to your application. They will be able to sign in to Foxo via your Active Directory and if they don’t exist yet, they can be created via Provisioning.